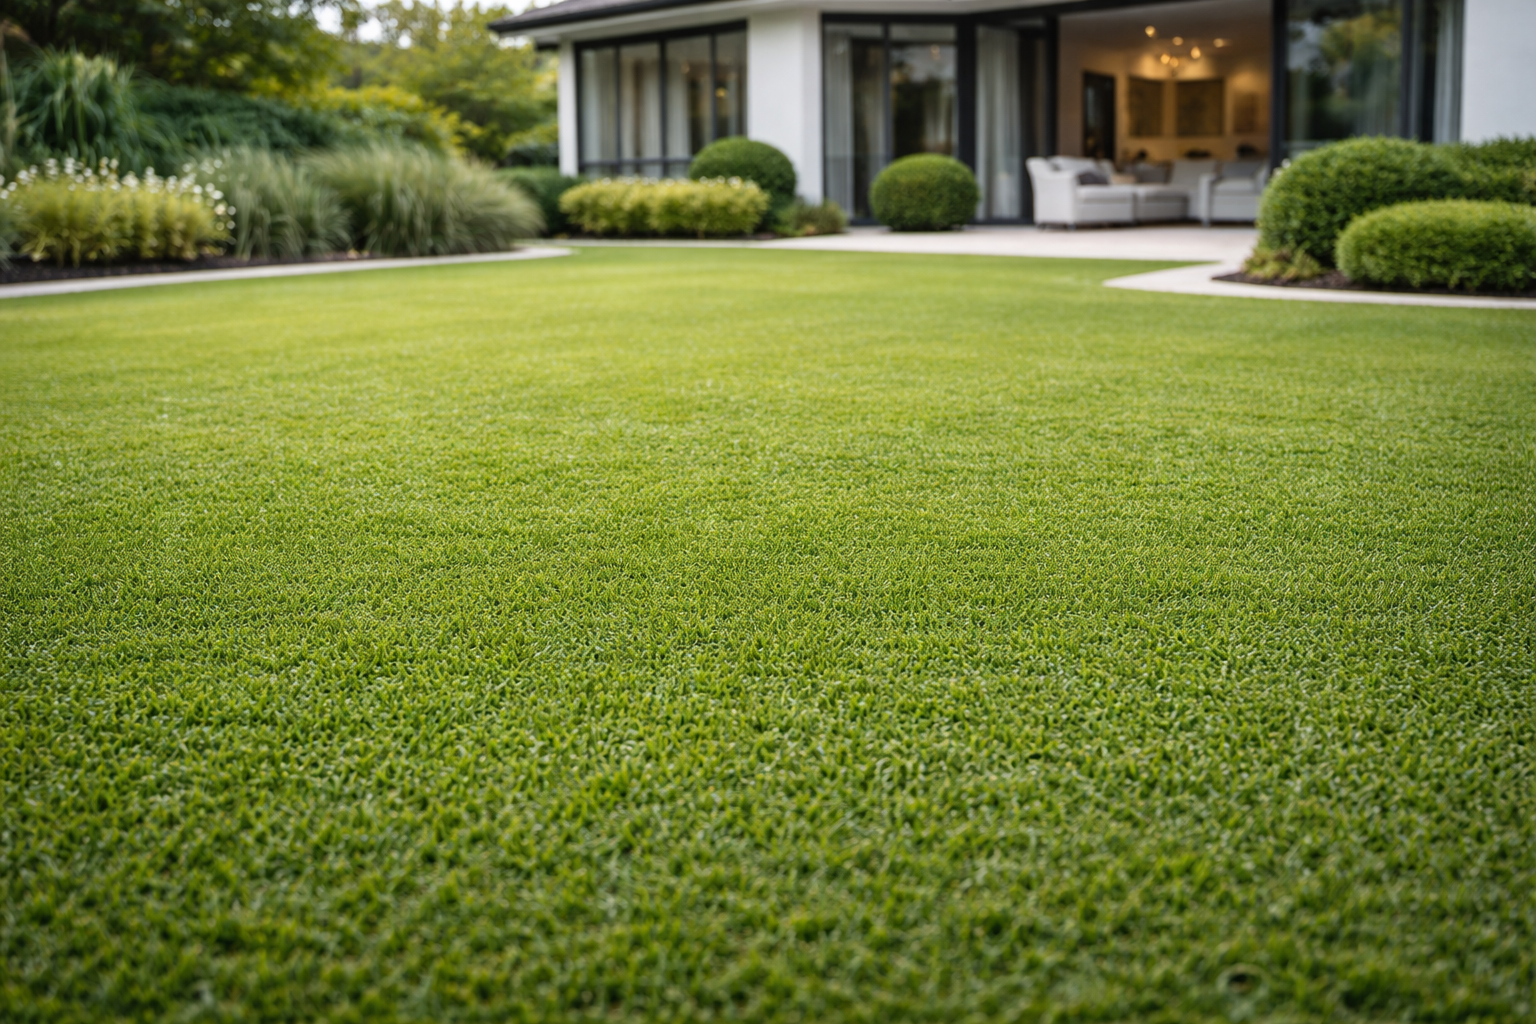
A beautiful lawn does not begin when the turf arrives. It begins in the soil beneath it.
Instant turf is a living plant, not a decorative surface you simply roll out like carpet. The health of your lawn depends on what is happening in the top 100mm of soil. In Melbourne’s diverse landscapes, preparation makes all the difference. From the heavy clay soils common in northern suburbs to the sandy coastal soils near the bay, the ground must be prepared correctly for turf to establish strong roots and thrive.
In our experience working with Melbourne homeowners every day, roughly 80% of a lawn’s success happens before the pallet of turf arrives.
Whether you’re planning to install Prestige® Buffalo, Santa Ana Couch, Tall Fescue, or Kikuyu, the same principle applies: if the soil is prepared properly, your lawn will establish faster, stay healthier, and handle Melbourne’s changing seasons far better.
This guide walks you through the professional process we use when preparing ground for turf laying.

Before you add soil or level the ground, the existing lawn or weeds must be completely removed.
Any remaining grass, roots, or weeds will compete with your new turf for nutrients and water.
This waiting period is important because it ensures the plant has fully absorbed the herbicide, preventing regrowth later.
If the lawn is thick or well established, using a spade can be slow and uneven.
A better option is hiring a turf cutter. These machines slice beneath the grass layer and remove it evenly, typically at a depth of 25–30mm.
The benefits include:
The goal is simple: start with a clean, level surface free from living vegetation.
Melbourne soil varies significantly depending on location. What works in one suburb may not work in another.
Understanding your soil type helps ensure proper drainage and root development.
Clay soil is common across many northern and western suburbs.
Clay particles are extremely fine and pack together tightly, which causes:
To improve clay soil structure, we recommend applying gypsum.
Apply: 1 kg of gypsum per square metre
Spread it evenly across the surface before adding topsoil or underlay.
Gypsum works by breaking the bonds between clay particles, improving drainage and allowing water and air to move through the soil more easily.
Sandy soils are common in coastal suburbs and bayside areas.
These soils drain quickly but struggle to retain moisture and nutrients.
To improve sandy soil:
This helps ensure your turf roots stay hydrated during Melbourne’s dry summer periods.
Check your soil pH
Healthy turf grows best in soil with a pH between 6.0 and 7.5.
You can test this using a simple pH soil test kit, which is widely available at garden centres.
If your pH falls outside this range:
Correct pH helps turf absorb nutrients effectively and establish quickly.
Once the site is cleared and soil conditions addressed, the next step is creating the correct foundation.
For healthy turf establishment, you need at least 100mm of quality turf underlay.
The ideal mix is:
70% sand / 30% soil blend
This structure balances drainage and moisture retention, providing a stable root environment.
A common mistake homeowners make is underestimating how much soil they need.
To calculate the correct amount, we use this formula:
Area (m²) × Depth (m) × 1.6 = Tonnes of soil required
Example
If your lawn area is 50m² and you want 100mm (0.1m) of underlay:
50 × 0.1 × 1.6 = 8 tonnes of soil
This formula helps ensure you order the correct amount before starting your turf preparation.
Drainage is essential for preventing water pooling and root disease.
When levelling your soil, create a 1–2% fall away from your home.
That means:
10mm drop for every 1 metre of distance
For example:
This gentle slope allows water to flow away from buildings and prevents soggy lawn conditions after rain.

With your soil depth in place, the next step is creating a perfectly level surface before turf installation.
Professionals call this process screeding.
To achieve a smooth finish, we recommend using:
These tools help you distribute soil evenly and remove bumps or dips.
Before laying turf, the soil must sit 20–25mm below surrounding surfaces such as:
This allows space for the thickness of the turf slab so the finished lawn sits perfectly flush with hard surfaces.
Ignoring this step often results in turf sitting too high, causing drainage issues or messy edges.
Once the soil is level, lightly compact it using a water-filled lawn roller.
The soil should be firm but not rock hard.
A simple test:
If your boot sinks significantly, the soil needs more compaction.
If it leaves no mark at all, it may be overly compacted and should be lightly raked again.
The goal is a firm but workable base for roots to establish quickly.
Before laying turf, apply a starter fertiliser high in phosphorus.
Phosphorus plays a key role in root development and early establishment.
Spread the fertiliser evenly across the prepared soil and rake it lightly into the surface.
Different turf types benefit from strong early root growth.
These varieties are known for drought tolerance, but their resilience depends on establishing deep roots early.
Starter fertiliser helps kickstart this process.
Tall Fescue does not spread via runners like Buffalo or Kikuyu. Instead, it relies heavily on the soil environment.
This means moisture retention and nutrient availability during soil preparation are especially important.
A well-prepared soil base ensures Tall Fescue establishes evenly and maintains its dense appearance.
When ordering soil and turf, always allow 5–10% extra.
This small buffer prevents frustrating delays if your measurements are slightly short.
It is far cheaper to have a small pile of leftover soil than to organise a second delivery for half a tonne.
Most experienced landscapers follow this rule for every turf project.
Before installation day, run through this quick checklist.
Your lawn area should be:
✔ Fully cleared of weeds and old grass
✔ Soil amended for clay or sandy conditions
✔ pH tested and adjusted if necessary
✔ Filled with 100mm of quality turf underlay
✔ Graded to allow water to drain away from the house
✔ Levelled and screeded smoothly
✔ Sitting 20–25mm below surrounding surfaces
✔ Lightly compacted with a roller
✔ Treated with starter fertiliser
If all these steps are complete, your turf will have the ideal conditions to establish quickly.

Preparing ground for turf laying might feel like the hardest part of the project, but it is also the most important.
When the soil is prepared properly:
Think of soil preparation as the foundation of your lawn. Get this stage right, and everything that follows becomes much simpler.
Your soil is now prepared the professional way. The next step is choosing the right turf for your Melbourne home.
Browse our premium turf varieties or get a quote from HG Turf Group and turn your prepared ground into a beautiful, thriving lawn.